

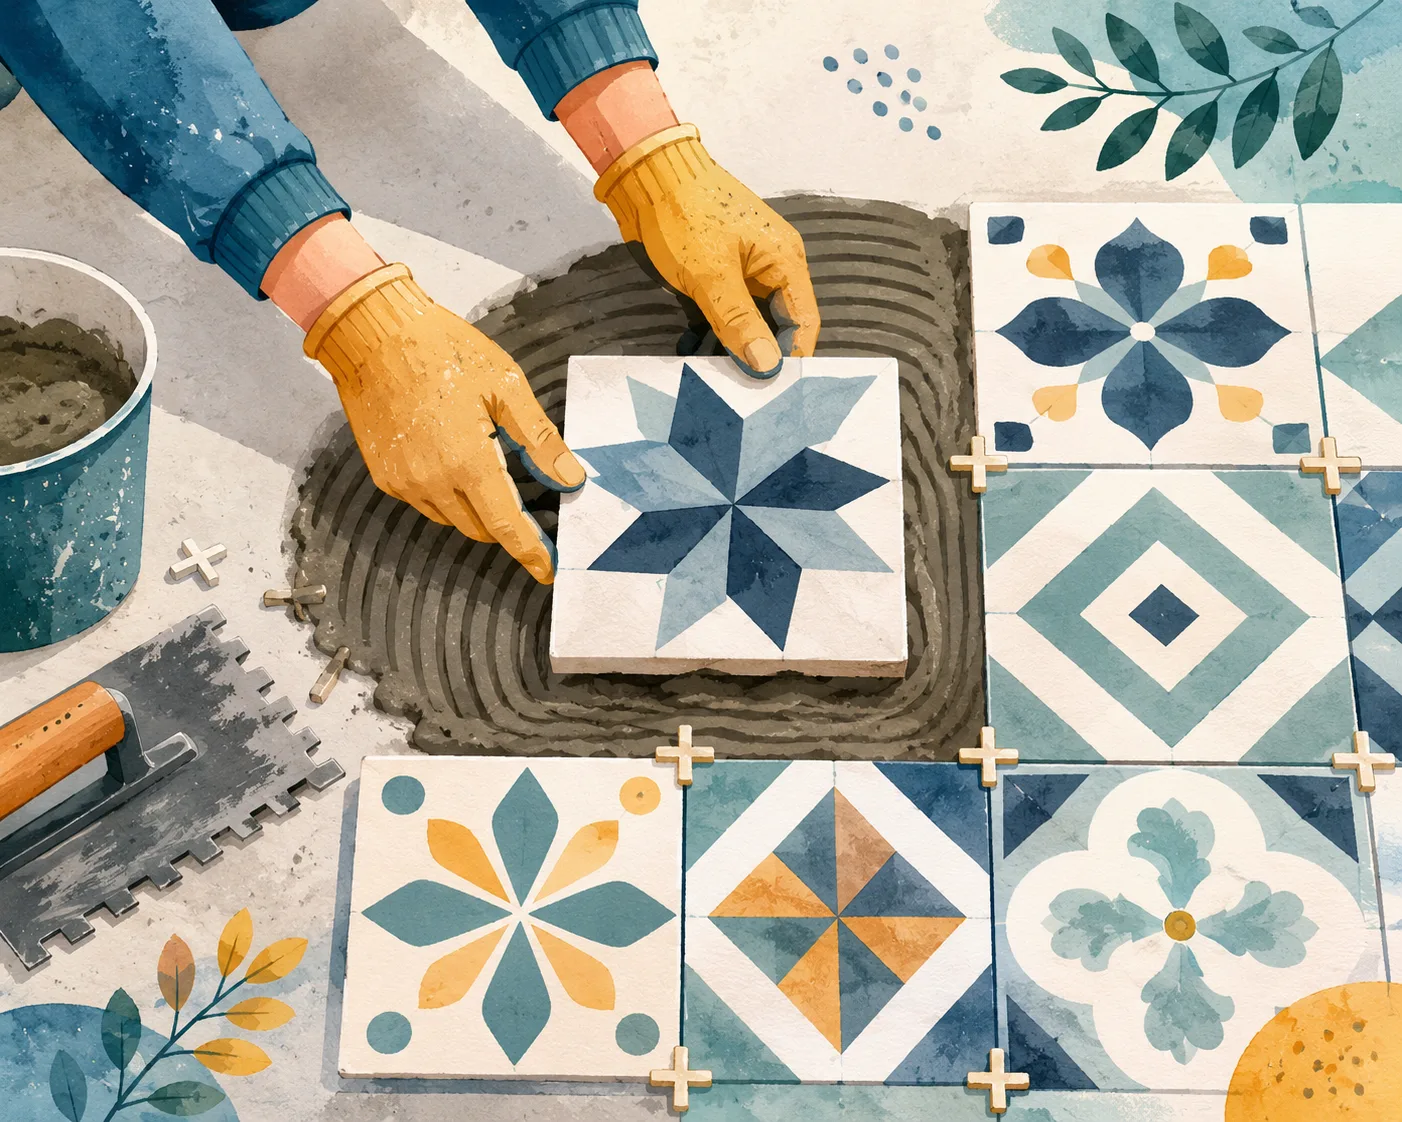
Ceramic tile and concrete go together like coffee and mornings. One is durable, the other is stable, and when both are installed correctly, the result can last for decades. Whether you are remodeling a basement, upgrading a garage floor, renovating a kitchen, or transforming a patio, learning how to put ceramic tile on concrete properly can save you from expensive repairs and frustrating cracks later.
A lot of homeowners think tiling concrete is simply about spreading adhesive and sticking tiles down. That’s where problems begin. The real magic happens underneath the tile. Surface preparation, moisture control, layout planning, adhesive selection, grout application, and sealing all work together like gears inside a machine. Ignore one step, and the whole installation can fail over time.
Recent industry recommendations from the stress that substrate preparation and moisture testing are among the biggest factors affecting tile longevity. Modern polymer-modified thin-set mortars and crack-isolation membranes are also becoming standard for concrete tile installations because they reduce the risk of bond failure and tile cracking.
Before you grab a trowel and start laying tile, it’s important to understand the entire process from the ground up. Think of this article as your roadmap through every stage of the project. By the end, you’ll know how to prepare concrete properly, choose the right adhesives and grout, plan your layout like a professional, install tiles step by step, and keep the finished floor looking brand-new for years.
Why Concrete Is an Ideal Surface for Ceramic Tile
Concrete is one of the best foundations for ceramic tile because it provides the kind of rigid stability that tile installations crave. Tile hates movement. Even tiny shifts in a floor can lead to cracked grout lines, hollow tiles, or complete bond failure. Concrete, when properly cured and structurally sound, minimizes those risks better than wood subfloors or flexible materials. That’s why ceramic tile over concrete is such a common choice in homes, commercial buildings, shopping centers, and even airports.
One major advantage of concrete is its incredible load-bearing capacity. Heavy furniture, appliances, and constant foot traffic are less likely to cause flexing or shifting. According to recent installation guidance from flooring professionals, properly installed tile floors on concrete can last anywhere from 20 to 50 years with minimal upkeep. That kind of longevity makes ceramic tile a smart investment rather than just a cosmetic upgrade.
Concrete also works exceptionally well with radiant heating systems. Because concrete stores and transfers heat efficiently, ceramic tile floors remain warm and comfortable while helping improve energy efficiency. Imagine walking barefoot across a heated tile floor on a cold morning. It feels luxurious without requiring high maintenance. This combination is becoming increasingly popular in modern renovations and new construction projects.
Areas where concrete tile installations shine include:
| Area | Why It Works Well |
|---|---|
| Basements | Moisture-resistant and durable |
| Kitchens | Handles spills and heavy traffic |
| Garages | Supports vehicle weight and wear |
| Patios | Excellent weather durability |
| Bathrooms | Ideal for wet environments |
Still, even though concrete is strong, it’s not automatically ready for tile. Many slabs contain hidden moisture problems, hairline cracks, uneven surfaces, or contaminants that can sabotage the installation later. Think of concrete like the foundation of a house. If the base isn’t prepared properly, everything built on top becomes vulnerable.
Inspecting the Concrete Before Installation
Before laying a single tile, you need to become a detective. A concrete slab may look solid on the surface, but hidden issues underneath can turn your beautiful tile floor into a nightmare within months. This inspection phase is where smart installers separate themselves from impatient DIYers.
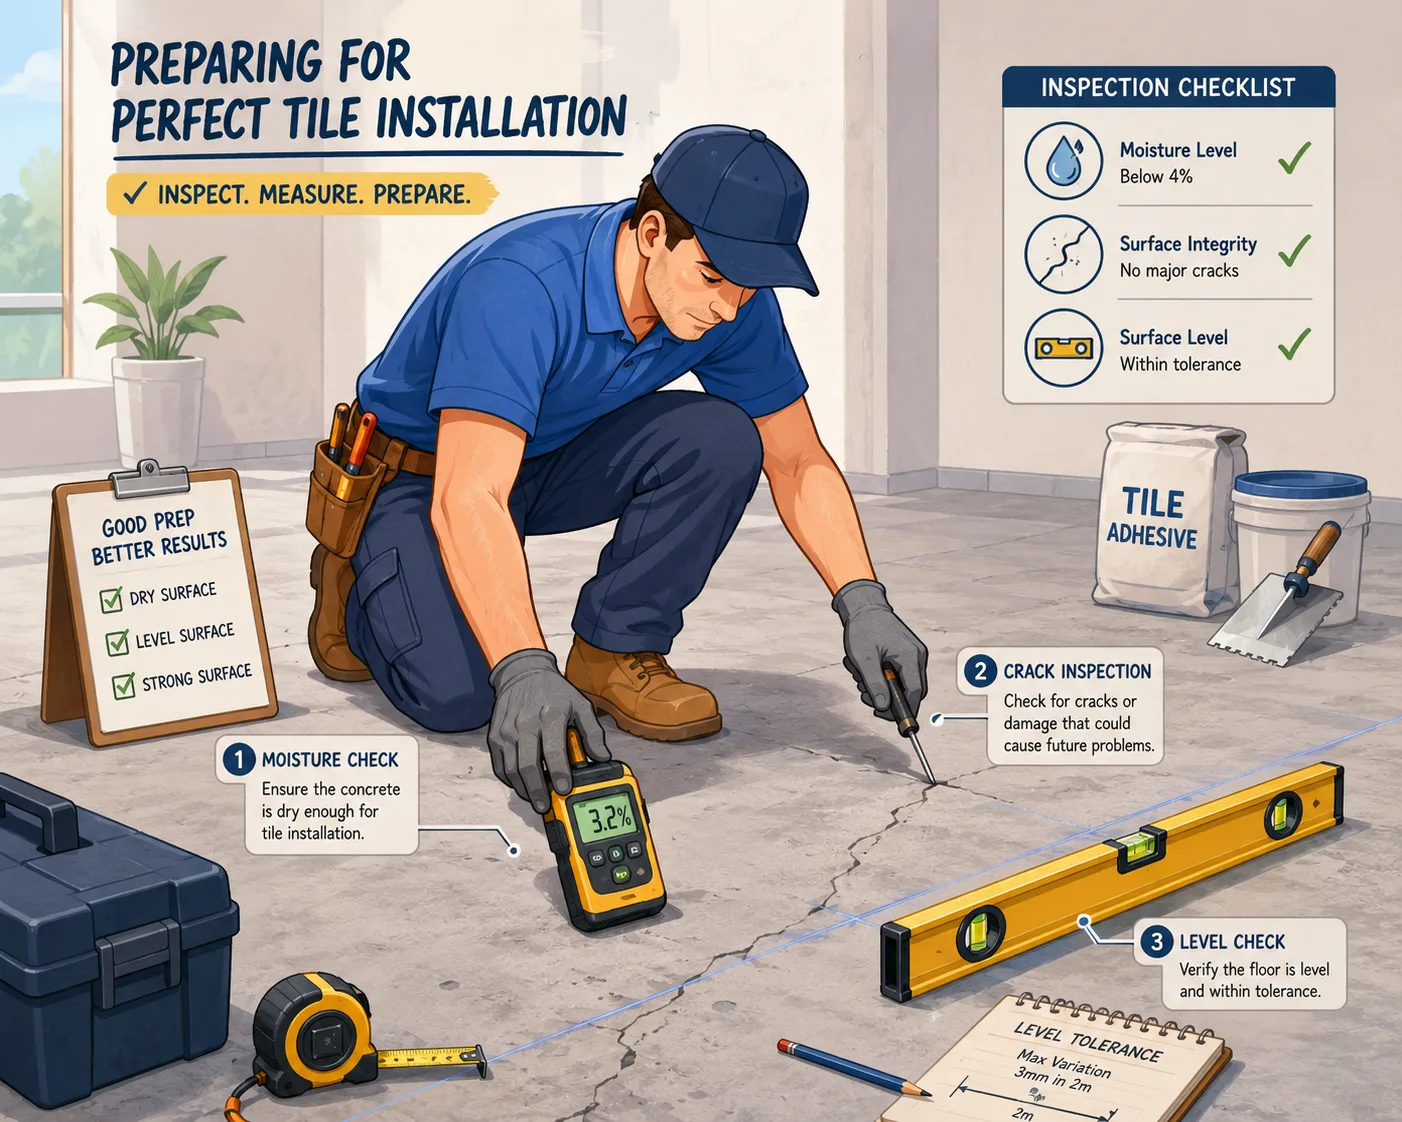
Start by checking for cracks. Not every crack is a disaster, but you need to understand what type you’re dealing with. Hairline shrinkage cracks are common and usually manageable with crack-isolation membranes or flexible fillers. Structural cracks, however, can indicate foundation movement or slab failure. If you notice wide cracks, uneven sections, or signs of shifting, it’s worth consulting a professional before moving forward. Ignoring these problems is like putting fresh paint over rust. It might look good briefly, but trouble is brewing underneath.
Moisture testing is another critical step that many homeowners skip. Concrete is porous, meaning it can absorb and release moisture for years after it cures. Excess moisture trapped beneath tile can weaken adhesives, create mold issues, or cause tiles to loosen over time. Recent flooring industry recommendations strongly emphasize moisture testing before any tile installation on concrete.
Professional installers often use:
- Calcium chloride moisture tests
- Relative humidity probes
- Moisture meters
A simple plastic sheet test can also give homeowners a rough idea. Tape a plastic sheet tightly to the concrete and leave it for 24 hours. If condensation appears underneath, moisture may be a concern.
Flatness matters too. Industry standards generally allow only about 1/4-inch variation over 10 feet for ceramic tile installations. Uneven concrete creates lippage, where tile edges sit at different heights, making the floor look amateurish and increasing the risk of chipping.
Inspection may not feel exciting, but it’s the stage that protects your investment. Skipping it is like building a house without checking the soil first. Everything may seem fine until cracks begin spreading across your floor months later.
Explore More: What Is the Crawl Space in a House and Why It Matters
Preparing the Concrete Surface Properly
Surface preparation is where the real work begins. This stage often determines whether your tile installation lasts two years or twenty. Think of concrete preparation like preparing a canvas before painting. Even the best materials cannot compensate for a dirty or unstable base.
The first task is cleaning. Concrete surfaces collect dust, grease, paint residue, curing compounds, and oils that interfere with adhesion. Thin-set mortar needs a rough, porous surface to grip effectively. Sweeping alone isn’t enough. Use a degreaser, heavy-duty cleaner, or concrete grinder if necessary. Some professionals compare proper concrete preparation to sanding wood before staining. If the surface is glossy or contaminated, the adhesive simply won’t bond correctly.
Mechanical grinding or shot blasting is often recommended for smooth slabs because it creates the rough texture needed for maximum adhesion. Industry experts consistently stress that contaminants and sealed surfaces are among the leading causes of tile failure.
Once clean, focus on leveling the slab. Low spots, dips, and humps create installation headaches. Self-leveling compounds work well for correcting uneven surfaces, especially in larger rooms. Avoid trying to compensate for uneven concrete by applying extra adhesive under certain tiles. That shortcut almost always causes weak bonding and uneven finishes later.
Crack repair is equally important. Small non-structural cracks can often be repaired with flexible epoxy or polyurethane fillers. Expansion joints, however, must never be ignored. Concrete naturally expands and contracts with temperature changes. Tile installations need movement joints to accommodate this motion. Many professional installers and experienced contractors warn that failing to honor expansion joints is one of the biggest causes of cracked tile floors.
Here’s a simple breakdown of preparation priorities:
| Preparation Step | Purpose |
|---|---|
| Cleaning | Removes contaminants |
| Grinding | Improves adhesion |
| Leveling | Prevents uneven tile surfaces |
| Crack Repair | Stops future tile cracking |
| Moisture Testing | Prevents adhesive failure |
Preparation takes time, but it’s the hidden backbone of every successful tile project. The tile itself gets all the attention, but the surface beneath it does the heavy lifting.
Choosing Adhesives and Grout Suitable for Concrete
Choosing the correct adhesive and grout is like selecting the right tires for a car. Even the most beautiful ceramic tile will fail if the bonding system underneath cannot handle the environment. Modern tile installations rely heavily on high-performance materials designed specifically for concrete substrates.
Traditional cement-sand mortar used to dominate tile installations decades ago, but modern polymer-modified thin-set mortars have largely replaced it for good reason. These adhesives offer superior flexibility, stronger bonding strength, and better moisture resistance. According to recent industry discussions, many tile failures happen because outdated mortar systems cannot properly bond modern low-porosity ceramic and porcelain tiles.
For most residential concrete tile projects, polymer-modified thin-set mortar is the safest and most effective choice. It accommodates slight movement in the slab while maintaining strong adhesion. Large-format tiles often require medium-bed mortar, which prevents sagging and uneven support.
Here’s a quick comparison:
| Adhesive Type | Best Use |
|---|---|
| Polymer-Modified Thin-Set | Standard ceramic tile on concrete |
| Medium-Bed Mortar | Large-format tiles |
| Epoxy Adhesive | High-moisture or industrial areas |
| Traditional Mortar | Limited modern applications |
Grout selection matters just as much. Grout fills the joints between tiles, prevents moisture penetration, and stabilizes the entire installation. Choosing the wrong grout can lead to cracking, staining, or water damage.
Sanded vs Unsanded Grout
Sanded grout contains fine sand particles, making it stronger for wider joints typically over 1/8 inch. Unsanded grout works better for narrow joints and delicate tile surfaces that might scratch easily. Epoxy grout, although more expensive, offers superior stain resistance and durability, making it popular for kitchens, bathrooms, and commercial areas.
Professionals also recommend sealing cement-based grout after installation because grout is naturally porous. Unsealed grout behaves almost like a sponge, soaking up dirt, moisture, and stains over time. A quality sealer acts like an invisible raincoat protecting your floor from daily wear.
The adhesive and grout system may not be visible after installation, but it functions like the skeleton beneath the skin. Choose wisely, and your floor stays solid for decades.
Essential Tools and Materials
Tile installation becomes dramatically easier when you have the right tools. Trying to install ceramic tile without proper equipment is like trying to cook a gourmet meal using only a spoon. Technically possible? Maybe. Frustrating and inefficient? Absolutely.
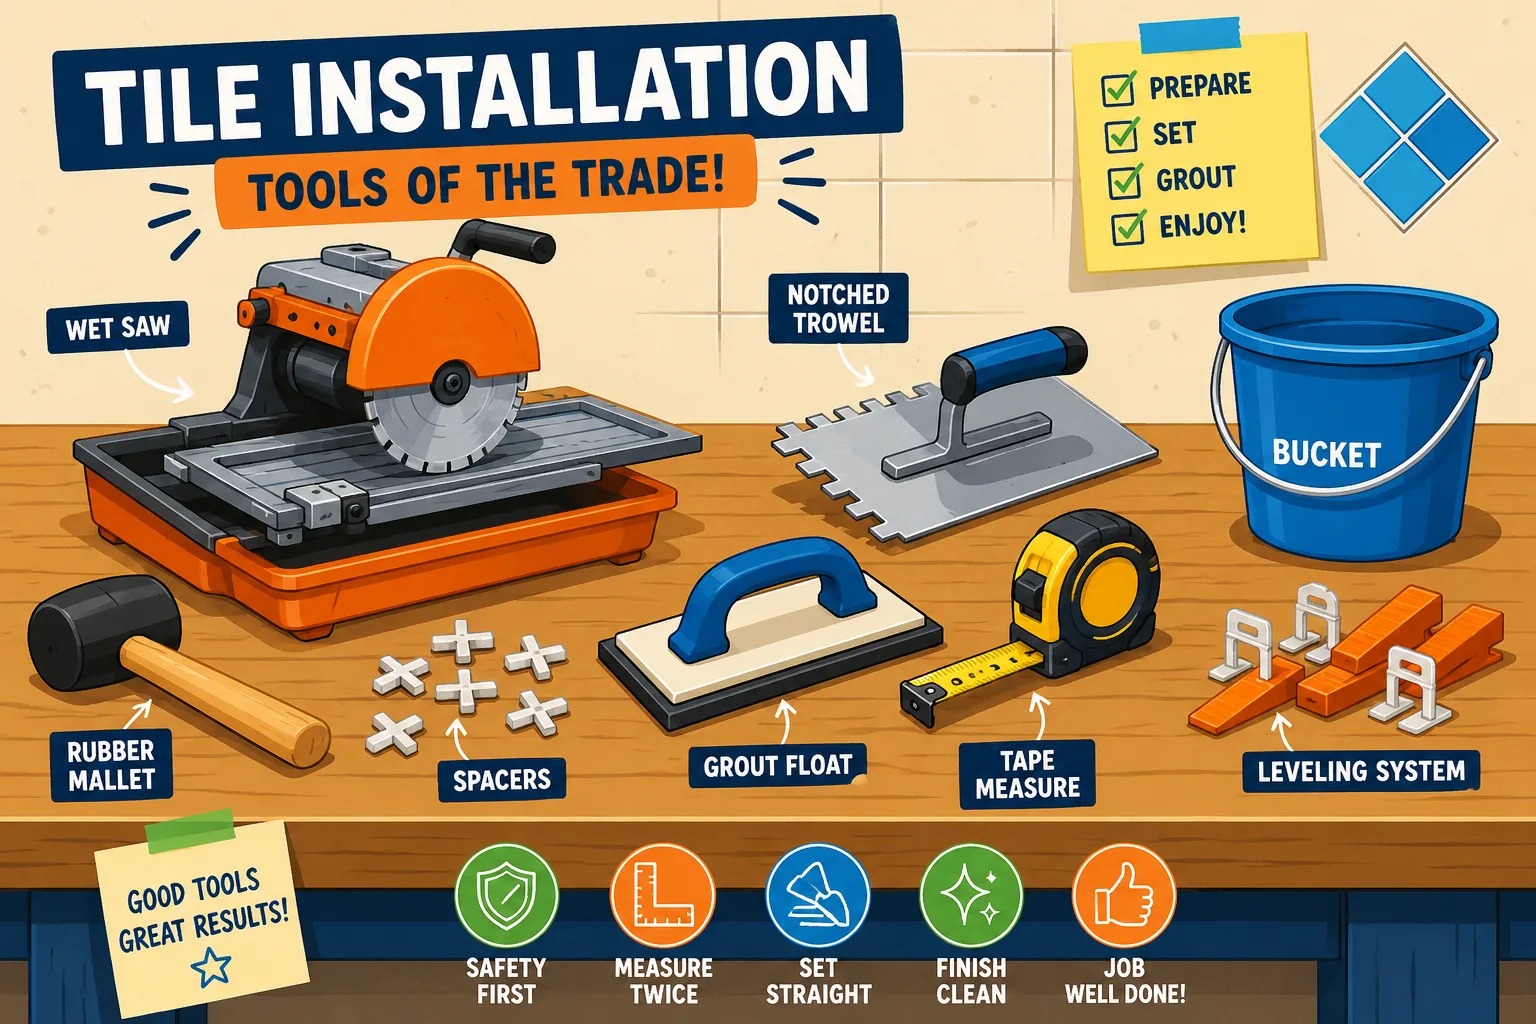
The core tool every installer needs is a notched trowel. The notch size affects how much adhesive gets applied and directly impacts tile coverage underneath. Improper troweling can create hollow spots beneath tiles, which become weak points under pressure. The Ceramic Tile Foundation recently emphasized correct troweling techniques because unsupported tile sections are highly prone to cracking.
A wet saw is another game changer. Ceramic tile can chip easily when cut incorrectly, so investing in a quality diamond-blade wet saw helps produce clean edges and accurate cuts. Tile nippers and manual score-and-snap cutters are useful too, especially for smaller adjustments.
Other must-have tools include:
- Tile spacers
- Rubber grout float
- Mixing bucket
- Level
- Chalk line
- Tape measure
- Sponge
- Knee pads
- Rubber mallet
One tool many beginners overlook is the leveling system. Tile leveling clips help prevent lippage and maintain a professional-looking surface. Large-format tiles especially benefit from leveling systems because even slight height differences become very noticeable.
Safety equipment matters too. Grinding concrete creates large amounts of silica dust, which can be hazardous when inhaled. Eye protection, gloves, and dust masks are not optional extras. They’re necessities.
Good tools don’t just make installation easier. They improve accuracy, reduce waste, and help create a finished floor that looks professionally installed rather than obviously DIY.
Layout Planning and Cutting Techniques
Layout planning is where craftsmanship meets strategy. A beautiful tile floor rarely happens by accident. Professional installers spend significant time planning the layout before any adhesive touches the floor. Why? Because poor layout decisions stand out immediately, no matter how expensive the tile is.
Start by measuring the room carefully and identifying the center point. Dry fitting tiles without adhesive helps visualize how the final floor will look. This process prevents awkward slivers of tile along walls and ensures balanced spacing throughout the room.
Think of tile layout like framing a photograph. The edges matter just as much as the center. Small uneven cuts near walls can make an otherwise perfect installation look sloppy. Industry guidance consistently recommends centering layouts to minimize tiny perimeter cuts.
A chalk line becomes your best friend here. Snapping straight reference lines across the concrete creates a roadmap that keeps rows aligned. Without guide lines, tile installations can slowly drift off course, leading to crooked grout lines and uneven spacing.
Cutting techniques also require patience and precision. Straight cuts are typically handled using a wet saw or manual tile cutter. Curved cuts around pipes or fixtures often require tile nippers or angle grinders.
Here are some cutting tips professionals follow:
| Cutting Situation | Recommended Tool |
|---|---|
| Straight cuts | Wet saw |
| Small adjustments | Tile nippers |
| Curves and corners | Angle grinder |
| Thin ceramic tile | Manual cutter |
Always cut slowly and steadily. Rushing creates chipped edges and wasted material. Ordering 10–15% extra tile is considered standard practice because breakage and cutting waste are inevitable.
Layout planning may seem tedious, but it’s the stage where your floor transforms from random tiles into a cohesive design. Skip careful planning, and even expensive ceramic tile can end up looking chaotic.
Step-by-Step Tiling Process
Now comes the exciting part: actually laying the tile. This stage combines all the preparation, planning, and material selection into a finished floor. But success depends on following the process carefully rather than rushing ahead.
Start by mixing the thin-set mortar according to the manufacturer’s instructions. Consistency matters. Mortar that’s too thick becomes difficult to spread, while overly thin mortar weakens the bond. Let the mixture slake for the recommended time before remixing. Think of this step like letting bread dough rise. The chemistry needs time to activate properly.
Spread the adhesive using a notched trowel held at a consistent angle. Work in small sections because thin-set begins drying quickly. Avoid covering large areas all at once. Professionals also recommend “back buttering” larger tiles by applying a thin adhesive layer directly to the back of the tile for better coverage and support.
Place each tile carefully while twisting slightly to collapse the trowel ridges underneath. Tile spacers help maintain even grout joints. Use a level frequently to check alignment and prevent lippage.
Setting the Ceramic Tiles
Consistency is everything during installation. Each tile should sit firmly and evenly. Tap tiles gently with a rubber mallet if needed, but avoid excessive force. Periodically lift a tile to inspect adhesive coverage underneath. Poor coverage leads to hollow spots and future failures.
Movement joints deserve special attention. Concrete expands and contracts naturally, especially in areas exposed to temperature changes. Flexible joints or membranes help absorb this movement. Many experienced installers emphasize respecting expansion joints instead of covering them with rigid grout.
Grouting and Finishing
Once the adhesive cures fully, remove spacers and begin grouting. Use a rubber float to force grout deeply into the joints at a diagonal angle. Work methodically and clean excess grout before it hardens completely.
After the grout begins setting, wipe the surface gently with a damp sponge. Avoid overwetting because too much water weakens grout strength and color consistency.
Patience is essential during curing. Walking on freshly tiled floors too soon can disrupt alignment and weaken bonds. Most installations require at least 24 to 48 hours before light traffic.
Tiling is part science and part art. Every careful step adds strength, durability, and beauty to the finished floor.
Sealing and Maintenance for Longevity
A freshly tiled floor may look finished, but sealing and maintenance are what keep it looking beautiful for years. Think of sealing like waxing a car. It protects the surface from the daily abuse that slowly wears materials down over time.
Ceramic tile itself is often resistant to moisture and stains, but grout is another story. Cement-based grout is porous and easily absorbs water, dirt, grease, and spills. Sealing grout creates a protective barrier that reduces staining and moisture penetration significantly.
Experts strongly recommend sealing cement-based grout periodically, especially in kitchens, bathrooms, and outdoor spaces. Some sealers penetrate deeply into the grout while others create a surface coating. Penetrating sealers are often preferred because they maintain the grout’s natural appearance while offering excellent protection.
Maintenance is surprisingly simple when handled consistently. Use pH-neutral cleaners rather than harsh acidic chemicals that can damage grout and sealers. Abrasive scrubbers should also be avoided because they wear down protective coatings over time.
Here’s a practical maintenance schedule:
| Maintenance Task | Frequency |
|---|---|
| Sweeping/Vacuuming | Weekly |
| Damp Mopping | Weekly |
| Grout Inspection | Every 6 months |
| Resealing Grout | Every 1–2 years |
Prompt repairs matter too. Small grout cracks may seem harmless initially, but they allow moisture to seep underneath the tile. Over time, that moisture can weaken adhesives and encourage mold growth.
Outdoor tile installations require extra care because freeze-thaw cycles place additional stress on the system. Proper waterproofing and expansion joints become even more critical in exterior environments.
A well-maintained tile floor can easily outlast many other flooring options. The secret isn’t complicated. It’s simply about protecting the installation before problems begin.
Check Related: Step-by-Step Methods for How to Fix an Uneven Concrete Slab
Common Mistakes to Avoid
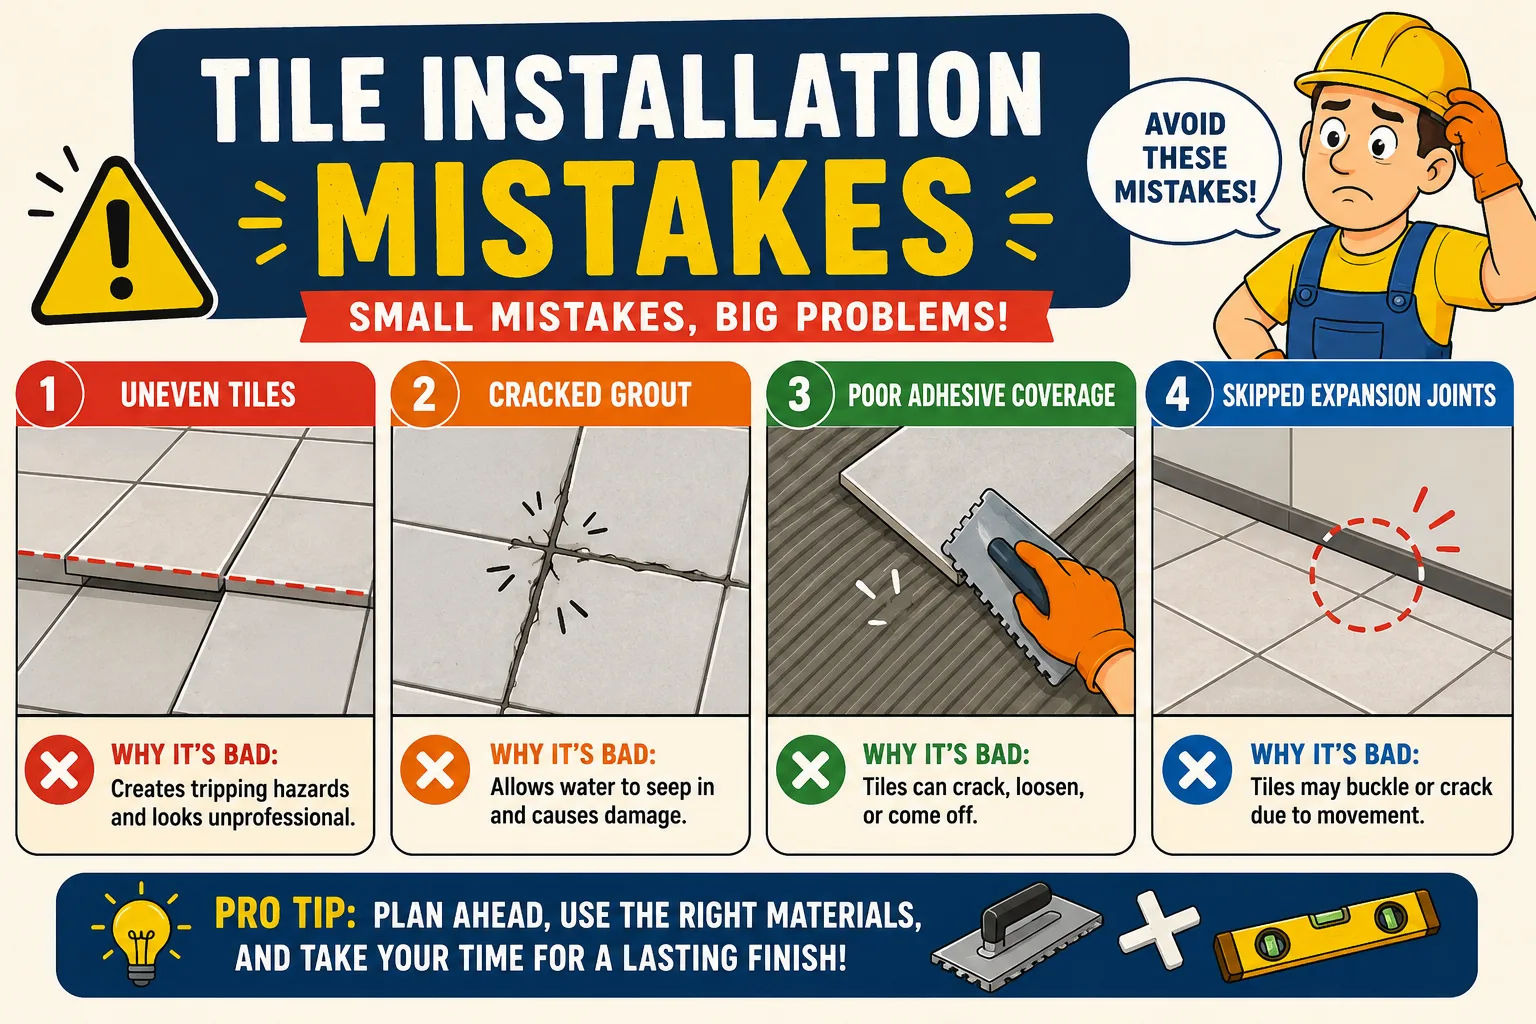
Tile installation mistakes often reveal themselves months after the project appears finished. That’s why avoiding common errors is just as important as learning the correct techniques.
One major mistake is skipping moisture testing. Concrete may look dry while still releasing vapor underneath. Excess moisture eventually weakens adhesives and causes tiles to loosen.
Another common problem is inadequate surface preparation. Paint residue, curing compounds, dust, and grease prevent proper bonding. No adhesive can compensate for a contaminated surface.
Incorrect mortar application also causes frequent failures. “Spot bonding,” where installers place blobs of mortar beneath tiles instead of full coverage, creates unsupported voids. Industry professionals strongly warn against this practice because unsupported areas crack easily under pressure.
Other costly mistakes include:
- Ignoring expansion joints
- Using the wrong grout type
- Rushing curing times
- Uneven troweling
- Poor layout planning
- Insufficient adhesive coverage
DIY installers sometimes try to save time by tiling directly over damaged or uneven concrete. That shortcut almost always backfires later. Proper preparation may feel slow initially, but repairs cost far more than patience.
The best tile installations aren’t rushed. They’re methodical, carefully planned, and built on strong fundamentals.
Conclusion
Learning how to put ceramic tile on concrete is about much more than simply attaching tile to a floor. Every successful installation begins beneath the surface with careful inspection, moisture testing, leveling, and crack repair. Once the concrete is properly prepared, choosing the correct adhesive and grout becomes the foundation for long-term durability.
Layout planning transforms the installation from functional to visually impressive, while careful cutting and proper mortar application ensure strong, even bonding. Sealing and ongoing maintenance then preserve the floor’s beauty for decades.
Concrete and ceramic tile are a powerful combination when installed correctly. Together, they create surfaces that are durable, elegant, moisture-resistant, and incredibly long-lasting. Whether you are upgrading a basement, remodeling a kitchen, or creating an outdoor patio, taking the time to follow each step carefully will reward you with a floor that performs beautifully year after year.
FAQs
1. Can you install ceramic tile directly on concrete?
Yes, ceramic tile can be installed directly on concrete if the slab is clean, level, dry, and structurally sound. Proper surface preparation and moisture testing are essential before installation.
2. What type of adhesive works best for ceramic tile on concrete?
Polymer-modified thin-set mortar is generally the best choice because it provides strong adhesion, flexibility, and moisture resistance for concrete installations.
3. Do concrete floors need sealing before tiling?
Not always. However, moisture-prone slabs may require moisture barriers or primers depending on the adhesive manufacturer’s recommendations and moisture test results.
4. How long should concrete cure before tiling?
Most professionals recommend waiting at least 28 days for new concrete to cure fully before installing ceramic tile.
5. How often should grout be sealed?
Cement-based grout should typically be resealed every 1 to 2 years depending on traffic levels and exposure to moisture.