
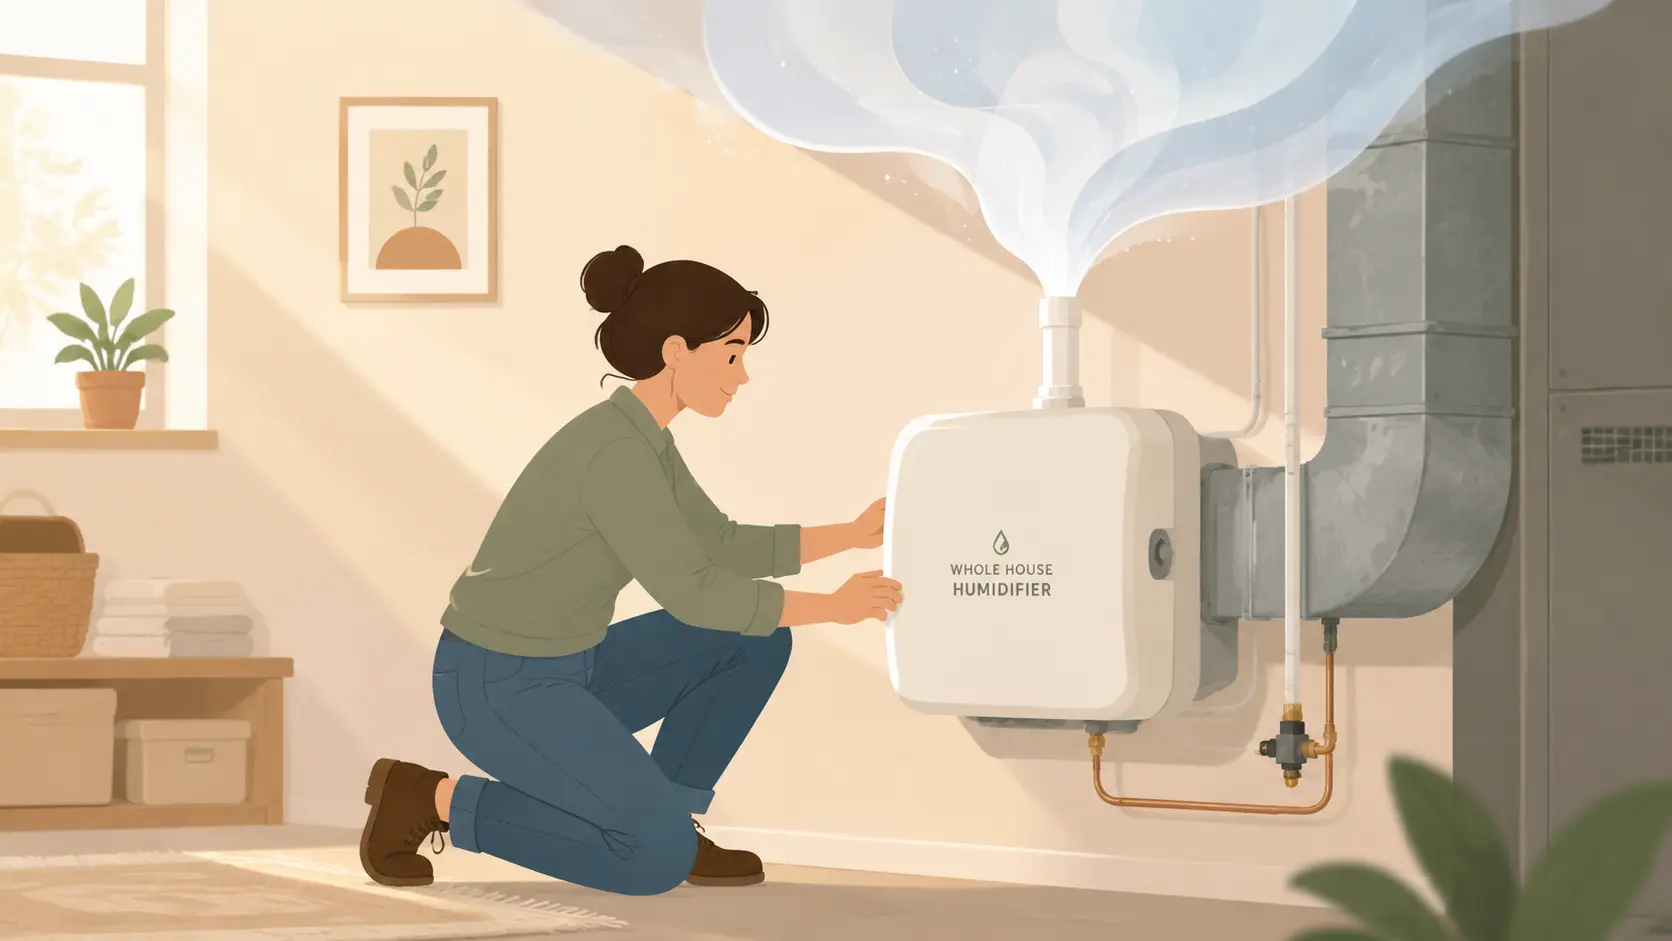
Dry indoor air can turn a comfortable home into something that feels more like a desert cabin in winter. Your skin cracks, your throat feels scratchy, hardwood floors begin creaking, and static electricity starts attacking every doorknob you touch. That is exactly why many homeowners are installing whole house humidifiers directly into their HVAC systems.
Unlike portable units that only affect one room, a whole-home humidifier distributes moisture throughout the entire house using your existing heating and cooling system. According to the U.S. Environmental Protection Agency, maintaining indoor humidity between 30% and 50% helps improve comfort while reducing problems caused by overly dry air.
Installing one may sound intimidating at first because it involves ductwork, water connections, electrical controls, and humidity calibration. The good news is that once you understand the process step by step, the project becomes far more manageable. This guide walks through everything from selecting the right humidifier type to testing operation and maintaining long-term efficiency.
Why Indoor Humidity Matters
People usually notice temperature first when thinking about indoor comfort, but humidity quietly controls how a home actually feels. You can set your thermostat to 72°F and still feel miserable if the air inside your house is bone dry. Low humidity strips moisture from your skin, nasal passages, and even wooden furniture. During winter, heated air naturally becomes drier, especially in homes with forced-air furnaces. That is why many households experience dry throats, nose irritation, static shocks, and cracked wood flooring once the heating season starts.
Research from the EPA shows that maintaining indoor humidity between 30% and 50% creates a healthier and more comfortable environment. When humidity drops below 30%, dry air symptoms become common. On the other hand, excessive humidity above 50% can encourage mold growth and dust mites. Think of humidity like seasoning in cooking. Too little ruins the experience, and too much creates a completely different problem. The goal is balance.
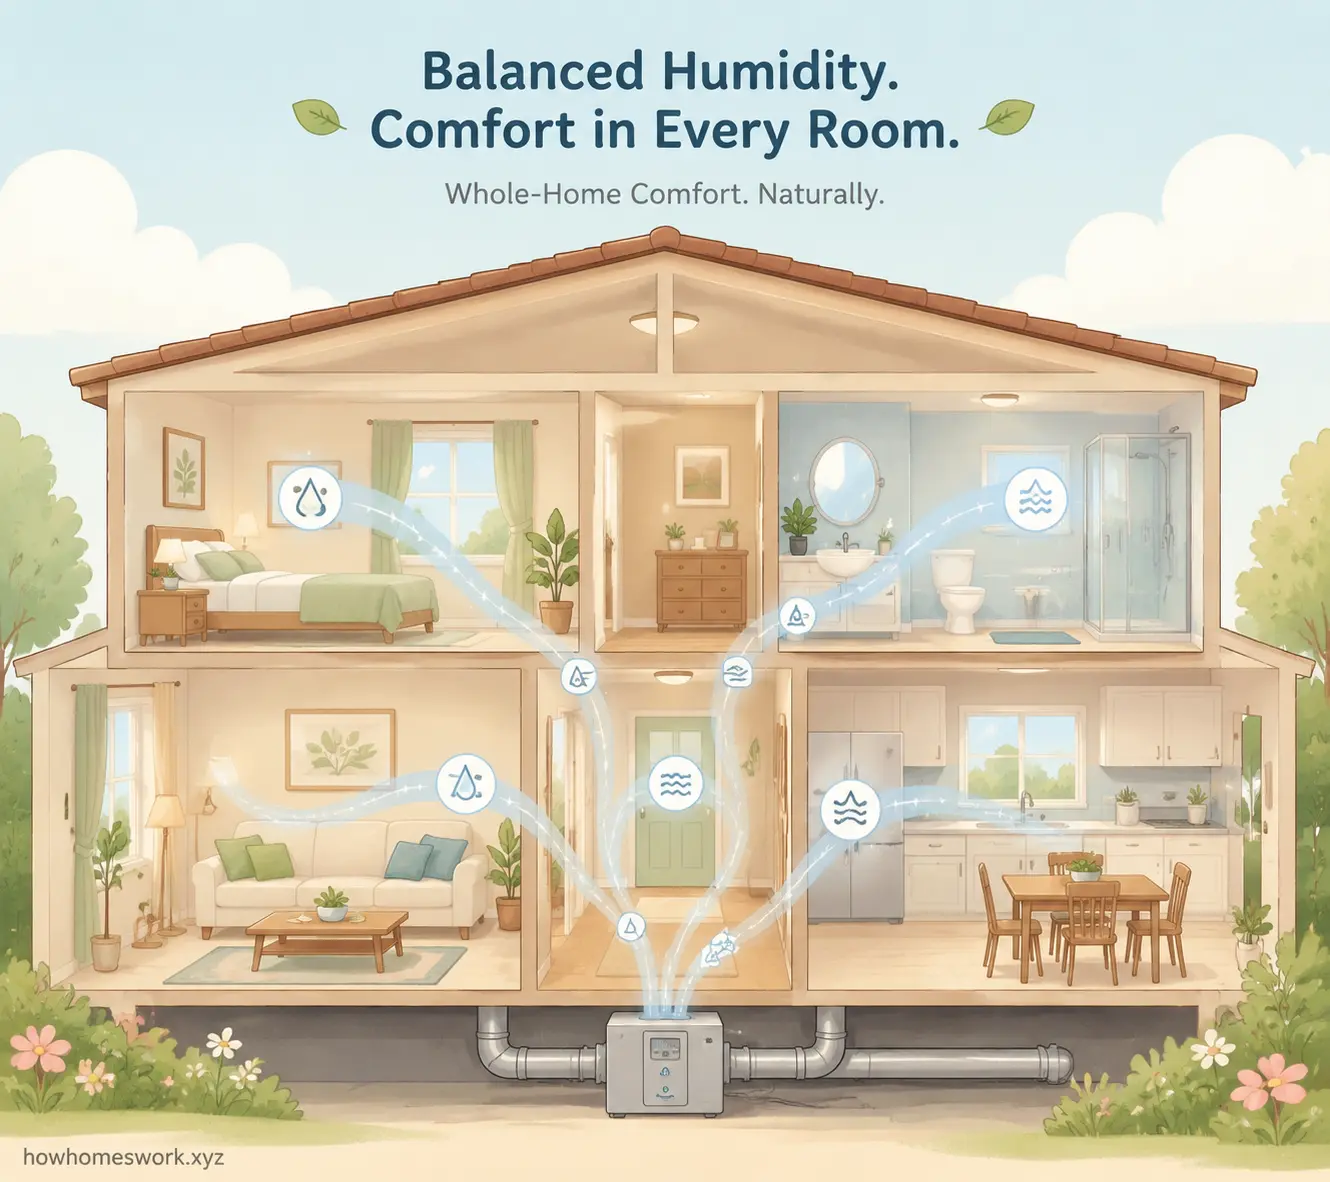
Whole house humidifiers help solve this issue by introducing controlled moisture into the HVAC airflow. Instead of running small portable units in multiple rooms, a centralized humidifier distributes moisture evenly through your ducts. This creates more consistent comfort while requiring less daily attention. Many homeowners also notice benefits like reduced static electricity, improved sleep comfort, and fewer respiratory irritations during winter months.
Common Problems Caused by Dry Air
Dry air affects more than comfort alone. It can gradually damage parts of your home and impact daily life in surprisingly annoying ways. Wooden furniture, hardwood floors, doors, and musical instruments can shrink or crack when moisture levels remain too low for extended periods. Electronics often accumulate static electricity, which can become irritating or even harmful to sensitive devices.
Health effects are another major reason homeowners invest in humidification systems. Dry air can irritate nasal tissues and respiratory passages, making it harder for your body to defend itself against airborne irritants. Some health experts note that low humidity can worsen allergy symptoms and increase discomfort during cold and flu season.
You might notice symptoms like:
- Dry or itchy skin
- Bloody noses
- Scratchy throat
- Persistent coughing
- Static shocks
- Cracked wood trim
- Peeling wallpaper
Once homeowners experience proper humidity levels, many say the difference feels immediate. The air becomes softer and less harsh, almost like switching from dry desert air to the gentle atmosphere near a lake.
Recommended Indoor Humidity Levels
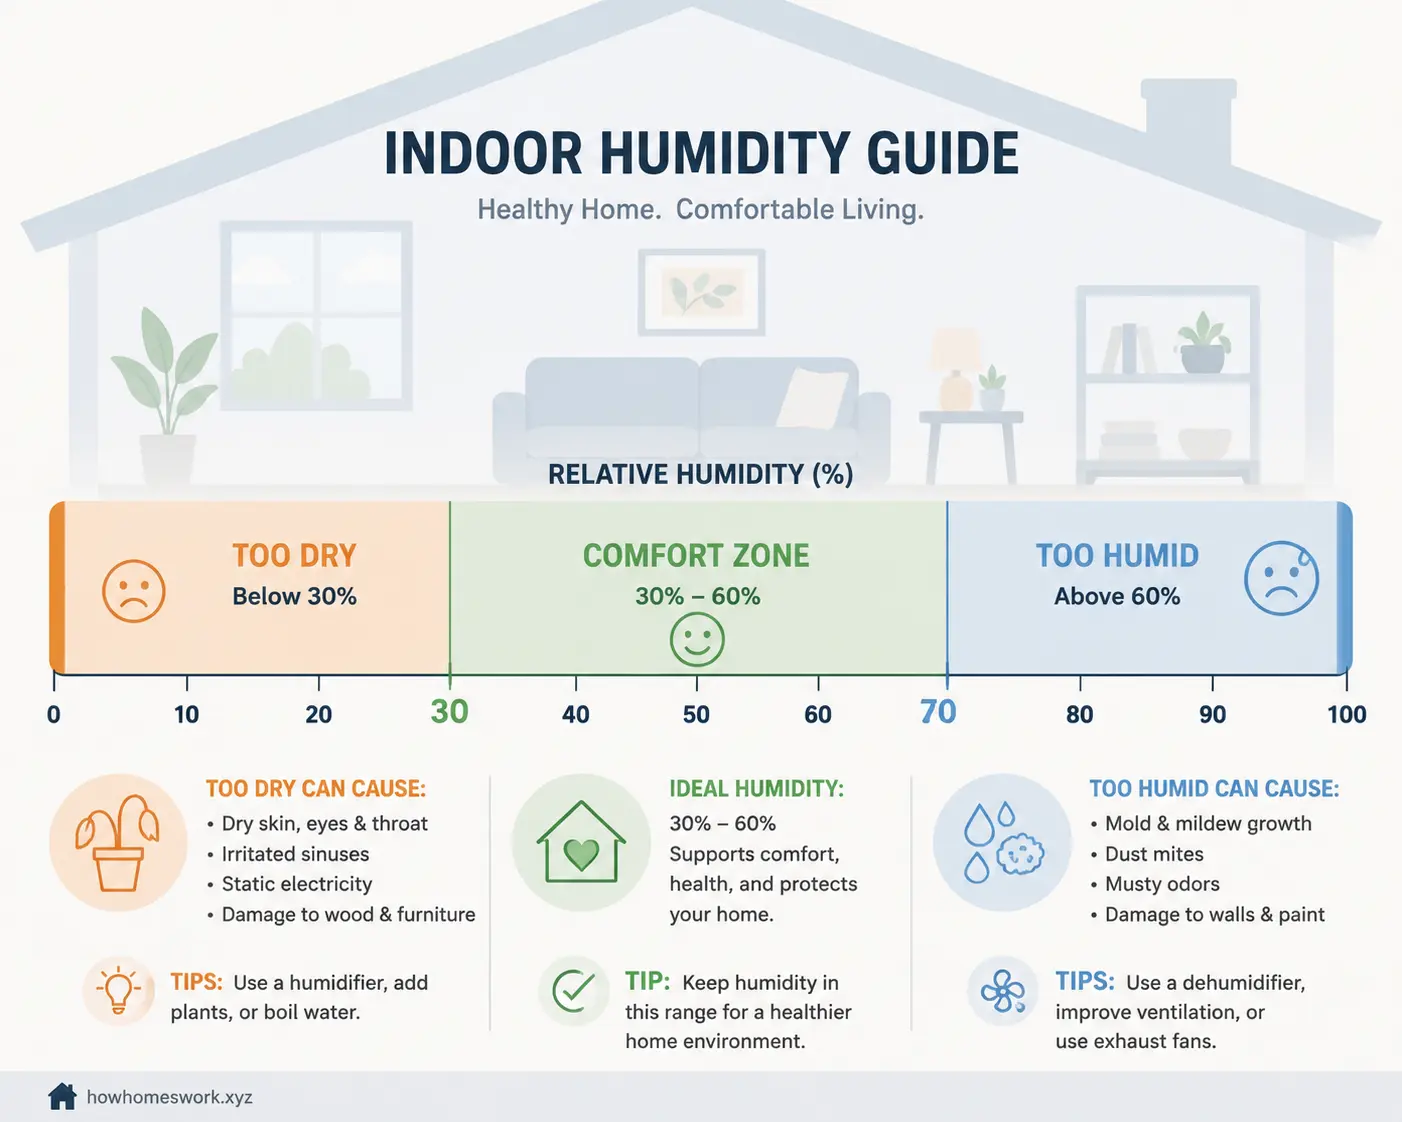
Humidity control is all about moderation. According to the EPA, indoor humidity should generally remain between 30% and 50%. Some HVAC professionals recommend staying closer to 35–45% during winter to prevent window condensation and mold growth.
Here is a quick reference table:
| Humidity Level | Indoor Impact |
|---|---|
| Below 30% | Dry skin, static electricity, irritated sinuses |
| 30%–50% | Ideal comfort and healthy balance |
| Above 50% | Increased mold and dust mite risk |
| Above 60% | Potential condensation and moisture damage |
The ideal setting depends partly on outdoor temperature. Extremely cold climates may require lower indoor humidity to prevent condensation on windows. A humidistat helps automate these adjustments so the system maintains consistent levels without constant manual changes.
Understanding Whole House Humidifier Types
Not all whole-house humidifiers work the same way. Choosing the wrong type can lead to installation headaches, reduced efficiency, or unnecessary maintenance. The three main categories are bypass humidifiers, fan-powered humidifiers, and steam humidifiers. Each one has strengths and trade-offs depending on your HVAC system and household needs.
Bypass humidifiers are among the most common because they are affordable and relatively simple. They rely on the furnace blower and use a bypass duct to move warm air through a water panel. Fan-powered units include an internal fan that improves airflow efficiency. Steam humidifiers, meanwhile, boil water to create steam and typically offer the most precise humidity control.
The best choice depends on factors such as home size, climate, furnace capacity, and installation space. Think of it like choosing between a bicycle, motorcycle, and sports car. All three get you somewhere, but the experience, power, and maintenance demands are completely different.
Bypass Humidifiers
Bypass humidifiers are popular because they balance effectiveness with affordability. These systems mount directly onto your ductwork and connect to a bypass duct that redirects warm air across a water panel. Moisture then evaporates into the airflow before circulating through the house.
One advantage is simplicity. Fewer moving parts usually mean fewer repairs over time. These units also consume less electricity because they rely on the furnace blower rather than a separate motor. Installation is often easier in homes with accessible ductwork near the furnace.
The downside is that bypass units depend heavily on furnace runtime. If your furnace does not run frequently, humidity production may be limited. They also require sufficient duct space for the bypass connection.
Fan-Powered Humidifiers
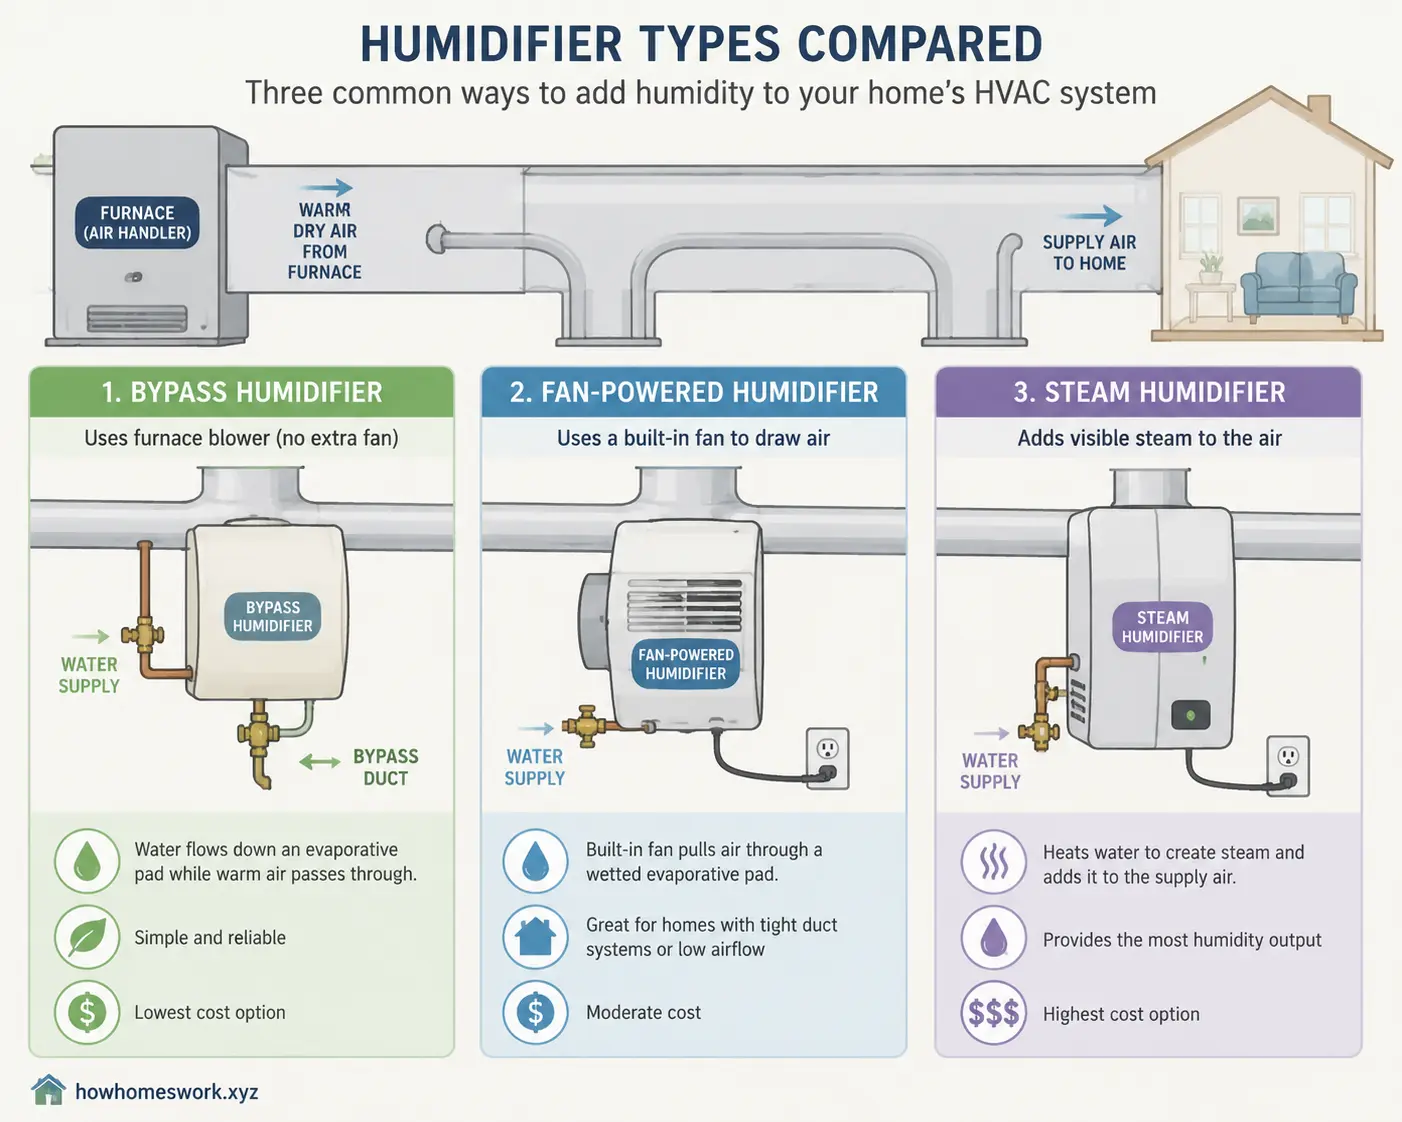
Fan-powered humidifiers work similarly to bypass systems but include a dedicated fan that pushes air across the water panel. This added airflow boosts efficiency and humidity output. Many HVAC professionals recommend these systems for larger homes or households struggling with very dry winter conditions.
Because they contain an internal fan, they do consume slightly more electricity. The installation can also become more complex due to electrical wiring requirements. Still, the improved moisture distribution often makes the extra effort worthwhile.
Many homeowners prefer these systems because they achieve humidity targets faster. Instead of waiting for furnace airflow alone, the fan actively supports moisture delivery throughout the duct network.
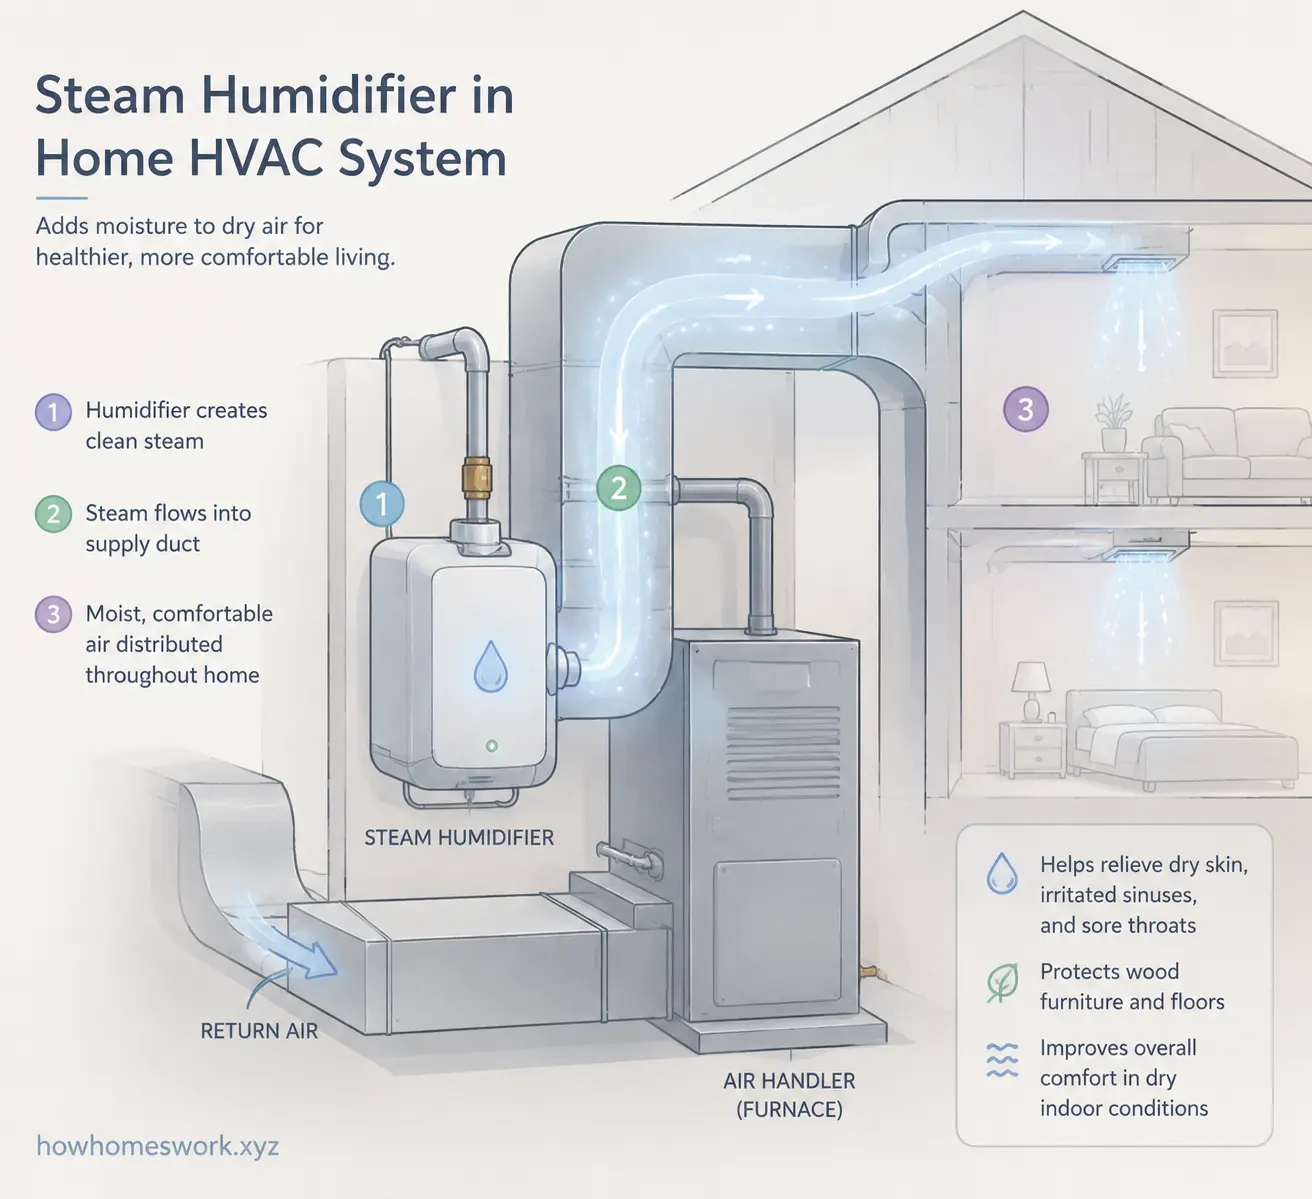
Steam Humidifiers
Steam humidifiers represent the premium category of whole-home humidification. Instead of relying on evaporation, these units boil water and inject steam directly into the HVAC airflow. This method provides rapid and precise humidity control, even in extremely dry climates.
Steam systems work independently of furnace heat, making them effective year-round. They are particularly useful in larger or tightly sealed homes where evaporative systems may struggle to keep up.
The trade-off is cost. Steam humidifiers are typically more expensive to purchase and install. They also consume more electricity due to the heating element. Maintenance becomes especially important because mineral buildup can affect performance over time.
Evaluating HVAC System Compatibility
Before installation begins, you need to determine whether your HVAC system can support a whole-house humidifier. This step often separates a smooth project from a frustrating one. Every furnace and duct configuration is different, and humidifier manufacturers design systems with specific airflow and clearance requirements.
The first thing to inspect is available duct space. Most humidifiers mount directly onto either the supply plenum or return duct near the furnace. If the area is crowded with filters, air cleaners, or structural obstacles, installation may require creative adjustments.
You should also confirm your furnace blower capacity. A humidifier adds resistance and moisture to the airflow, so the HVAC system must circulate air effectively throughout the house. Older furnaces with weak airflow may struggle to distribute humidity evenly.
Checking Furnace Capacity
Modern furnaces generally handle whole-house humidifiers without major issues. Still, airflow matters. Humidifiers depend on consistent air movement to distribute moisture properly. Weak airflow can result in uneven humidity or condensation near ducts.
A good rule is to check:
- Furnace blower strength
- Existing airflow balance
- Duct sizing
- HVAC age and efficiency
If your furnace already struggles to heat rooms evenly, adding a humidifier may expose those weaknesses even further.
Determining Ductwork Space
Proper installation space is critical. Most humidifiers require flat sheet metal surfaces for mounting and enough room for maintenance access. Trying to squeeze a humidifier into a cramped corner usually leads to future servicing frustrations.
Some homeowners install units on the return duct instead of the supply side when space is limited. HVAC discussions online suggest both locations can work, although supply-side installations may achieve slightly better performance in some systems.
Tools and Materials Needed for Installation
Preparation makes installation dramatically easier. Few things derail a project faster than realizing halfway through that you are missing a drill bit or shutoff valve. Whole-house humidifier installation combines plumbing, HVAC work, and low-voltage electrical connections, so having the correct tools nearby saves enormous time.
Common installation tools include:
| Tool | Purpose |
|---|---|
| Power drill | Mounting and duct cutting |
| Tin snips | Cutting sheet metal |
| Screwdriver set | Fastening panels and wiring |
| Adjustable wrench | Plumbing connections |
| Level | Proper humidifier alignment |
| Sheet metal screws | Securing components |
| Foil HVAC tape | Sealing duct connections |
Safety gear matters too. Sheet metal edges are razor sharp, and furnace areas often contain dust or insulation particles. Gloves and eye protection are not optional if you want to avoid cuts and irritation.
Essential HVAC Installation Tools
Tin snips are especially important because humidifier housings require openings cut into metal ductwork. Many DIY installers underestimate how difficult sheet metal can be to work with until they actually start cutting.
A cordless drill with multiple bits simplifies mounting considerably. You will also likely need a hole saw attachment if installing bypass ducting between supply and return ducts.
Safety Equipment and Supplies
Always disconnect power to the furnace before starting installation. Water and electricity are not a combination worth gambling with. Protective gloves help prevent sheet metal cuts, while safety glasses protect against flying metal fragments during cutting.
Having a drop cloth nearby also helps because duct cutting can create surprising amounts of debris.
Locating the Ideal Installation Point
Placement affects humidifier performance more than many homeowners realize. Installing the unit in the wrong location can reduce efficiency, create airflow problems, or complicate future maintenance.
Most installations occur near the furnace on either the supply plenum or return duct. The supply side carries warm heated air, which improves evaporation in bypass systems. Return-side installations are sometimes used when space limitations exist.
Supply Duct vs Return Duct Placement
Supply-side installations generally produce stronger humidity output because warm air absorbs moisture more effectively. That is why many manufacturers recommend mounting humidifiers on the warm-air supply plenum whenever possible.
Return-side installations can still work effectively, particularly in tight mechanical rooms. HVAC professionals online frequently mention successful installations in both positions depending on layout constraints.
Clearance and Accessibility Considerations
Never install a humidifier where maintenance access becomes impossible. Water panels require replacement, drains need cleaning, and electrical components occasionally need servicing.
Leave adequate space around the unit for:
- Filter replacement
- Water panel access
- Drain cleaning
- Wiring inspection
- Future repairs
Treat the humidifier like a car engine. If you cannot comfortably reach the components, maintenance eventually gets ignored.
Installing the Humidifier Housing
Once the location is selected, the physical installation begins. This stage involves cutting openings into the ductwork and mounting the humidifier securely. Accuracy matters because poor alignment can cause air leakage and inefficient operation.
Use the manufacturer’s template to mark the cutout dimensions. Double-check measurements before cutting because sheet metal mistakes are difficult to undo cleanly.
Cutting Into the Ductwork
<Then use tin snips or a sheet metal cutting tool to create the opening carefully. Wear gloves because freshly cut duct edges are extremely sharp.
Take your time during this step. Jagged or oversized cuts make sealing more difficult later.
Mounting and Securing the Unit
Once the opening is ready, place the humidifier housing against the duct and secure it using sheet metal screws. Use a level to ensure straight alignment before tightening fully.
Seal gaps using foil HVAC tape to prevent air leaks. Avoid standard cloth duct tape because it deteriorates over time under HVAC temperatures.
Connecting Water Lines and Controls
This is where the humidifier truly comes to life. Water supply connections and control wiring determine whether the system functions reliably or becomes a future headache.
Most humidifiers connect to a cold-water line using a saddle valve or dedicated shutoff valve. Many experienced installers recommend proper shutoff valves for improved reliability and easier maintenance.
Installing the Water Supply Line
The water line feeds moisture into the humidifier panel or steam chamber. Copper tubing and compression fittings are commonly used because they resist leaks effectively.
Steps usually include:
- Shut off the main water supply
- Install a shutoff valve
- Connect tubing to the humidifier inlet
- Check for leaks
- Secure tubing away from hot surfaces
Always include a drain line if required by the manufacturer. Excess water must exit safely to prevent standing moisture.
Wiring the Humidistat and Controls
The humidistat controls humidity levels automatically. Many systems connect directly to the furnace control board and activate during heating cycles.
Low-voltage wiring is typically straightforward, but improper wiring can damage HVAC controls. If electrical work feels outside your comfort zone, hiring an HVAC technician for this portion is wise.
Integrating with Existing Ductwork
Humidifiers must integrate cleanly with the existing HVAC airflow system. Poor duct integration can reduce efficiency and create uneven humidity distribution throughout the home.
Bypass humidifiers require a duct connection between supply and return air streams. This bypass duct allows warm air to circulate through the humidifier panel for moisture evaporation.
Bypass Duct Installation
Use flexible or rigid ducting based on manufacturer recommendations. Keep bends minimal because excessive turns restrict airflow. Secure all connections tightly with clamps or sheet metal screws.
Air leaks reduce efficiency dramatically. Even small gaps can waste conditioned air and reduce humidity output.
Sealing and Airflow Optimization
After installation, inspect every seam carefully. HVAC foil tape should cover joints completely. Proper sealing improves airflow consistency and prevents moisture loss inside mechanical spaces.
Think of airflow like water through a pipe. Every leak weakens the final output.
Testing Operation and Adjusting Humidity Levels
After installation, testing ensures every component operates correctly before full seasonal use begins. This stage often reveals minor issues like loose fittings or incorrect humidistat settings.
Turn on the furnace and activate the humidifier. Confirm that water flows correctly, airflow passes through the unit, and no leaks appear around plumbing connections.
Initial Startup Checklist
Before running continuously, inspect:
- Water line leaks
- Electrical connections
- Drain operation
- Humidistat response
- Airflow direction
A hygrometer helps confirm indoor humidity changes over time. Many homeowners notice improvements within several hours.
Fine-Tuning Humidity Settings
Start around 35% humidity during colder months and adjust gradually. If condensation appears on windows, humidity is likely too high.
EPA guidance recommends staying below 50% to avoid mold growth risks. Some HVAC professionals target 40–45% for ideal winter comfort.
Regular Maintenance for Efficiency and Safety
A whole-house humidifier is not a “set it and forget it” appliance. Maintenance determines whether the system remains beneficial or becomes a source of bacteria, mold, and mineral buildup.
The EPA specifically warns that poorly maintained humidifiers can spread microorganisms and mineral particles into indoor air. Regular cleaning and filter replacement are essential for safe operation.
Cleaning and Replacing Components
Most systems require seasonal maintenance that includes:
| Maintenance Task | Recommended Frequency |
|---|---|
| Replace water panel | Every heating season |
| Clean drain line | Every 3–6 months |
| Inspect water line | Annually |
| Clean humidifier housing | Every season |
| Check humidistat calibration | Annually |
Mineral deposits reduce efficiency significantly, especially in areas with hard water. Steam humidifiers may require more frequent cleaning because boiling water accelerates scale buildup.
Preventing Mold and Water Damage
Humidity should improve comfort, not create moisture problems. Excess humidity encourages mold growth, particularly around windows, insulation, and poorly ventilated spaces.
Signs of excessive humidity include:
- Condensation on windows
- Musty odors
- Damp drywall
- Visible mold spots
Keeping humidity balanced and maintaining the humidifier properly prevents most issues.
Conclusion
Installing a whole house humidifier transforms indoor comfort in ways many homeowners do not fully appreciate until they experience it firsthand. Dry winter air can make a home feel uncomfortable, unhealthy, and harsh, but properly balanced humidity changes the atmosphere dramatically. Skin irritation decreases, static electricity fades, wood furnishings stay healthier, and breathing often becomes easier during heating season.
The installation process involves several important stages, including selecting the right humidifier type, evaluating HVAC compatibility, mounting the unit, connecting water and electrical controls, and testing airflow performance. Each step matters because even a high-quality humidifier performs poorly if installed incorrectly.
Maintenance remains just as important as installation itself. Regular cleaning, water panel replacement, and humidity monitoring help ensure the system operates safely and efficiently year after year. The goal is not maximum humidity. The goal is balanced comfort that supports both your home and your health.
Once installed and properly adjusted, a whole-house humidifier quietly works in the background like an invisible comfort upgrade. You stop thinking about dry air because the problem simply disappears.
FAQs
1. What is the ideal humidity level for a home?
Most experts and the EPA recommend keeping indoor humidity between 30% and 50%. Around 35–45% is often considered ideal during winter.
2. Can I install a whole house humidifier myself?
Yes, many homeowners install bypass or fan-powered systems themselves if they are comfortable with HVAC, plumbing, and low-voltage wiring. Steam humidifiers are usually more complex and may require professional installation.
3. How often should a humidifier water panel be replaced?
Most manufacturers recommend replacing the water panel once per heating season. Homes with hard water may require more frequent replacement.
4. Can whole-house humidifiers cause mold?
They can if humidity levels remain too high or the system is poorly maintained. Keeping humidity below 50% and performing regular maintenance greatly reduces mold risk.
5. Are steam humidifiers better than bypass humidifiers?
Steam humidifiers provide faster and more precise humidity control, especially in larger homes. Bypass humidifiers are more affordable and simpler to maintain, making them a popular option for many households.